Thursday, May 19, 2011

How to Screen in a Porch

Screening in a porch is easy if you have 2 people. The first step is deciding what kind of screen that you want. There is vinyl, metal mesh (aluminum or stainless steel ), and fiberglass. Screens also have a UV rating that you might want to take into consideration and how big the mesh is spaced like no see'em screen (This screen I have only ever seen in Florida.) You also have 3 standard colors to choose from Silver, Black and Bronze. It can range from $40 a roll to $400 a roll depending on size and length that you will need. (All prices were compared between Lowes and Home Depot.)

Material List:
Razor Knife 
Nails (Finish or Roofing)
Lath Boards
Hammer
Saw
Screen
Staples 
Staple Gun
Speed Square
Cordless Drill
Drill Bits

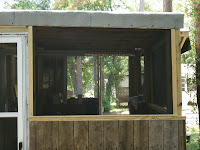
My buddy who I helped to remodel his deck decided that he wanted to screen in his porch after we finished the remodel.So we started with the angled portion of the deck. We started by rolling out the length that we need first  and giving and extra foot to a foot and a half extra per side. After getting the section cut and laid out straight, we started at the top where we wanted the screen to be at.Going from the top and working our way down to bottom. We attached the screen by stapling the screen into place where we wanted it to be. As you can see in the middle picture. Now after working the screen was worked into place as you can see by the right and left pictures.

held on by staples


We put our lath boards into place. (I recommend that either finish nails be used to secure the lath board.) Now we started putting the lath boards on the same way that we did the screen. We predrilled all holes so as not to split the wood to the best of our ability. We restreched the screen as we went along to prevent as many wrinkles as possible. So now that we have put our lath boards on we follow them and cut off all excess screen around the lath boards using a razor knife. I repeated this process on the other half of the deck so that we had everything as uniform as possible.


Now that the porch is all screened-in we cleaned up our mess put away our tools.

Monday, May 16, 2011

How To Stop A Running Toilet

Running toilet are a common problem in many households the  90% of the time it's either the fill valve or the flapper that are the problem.

Steps to Identifying the problem:

The first thing that you need to do is remove the lid off the back of the toilet.

The second step is looking at the overflow and seeing if the water in the tank is to high or set at least 1/2 in below the top of the overflow. If the water is at the top of the overflow the you will need to adjust the fill valve so that the water stops below the overflow. I recommend that you leave at least 1inch below the overflow.

The third step is checking to see if the flapper is the problem. Now if you think it is the flapper you should see water running in the toilet bowl. To see if it is the flapper put your hand on the flapper and press down. If the water stopped flowing into the toilet bowl then you need to replace the flapper. If the water is still flowing then the Fill valve may need to be replace or the flush valve is old and worn out and will need to be replaced. All the parts for inside a toilet tank come with replacement instructions and are easy to follow. If you have any questions please post them in the comment section and I will answer them in a timely manner.

Friday, May 13, 2011

Revamping The Old to Look New part 2


Hi all I 'm back with more pics, descriptions and instructions on what we have done to the deck and how we did it. So we put the flooring down first, then started with getting our measurements for the hand rail. We want the hand rail  to be the same height as the current handrail.


Now as you can see we laid the floor so that we had a solid surface to work on. You can't see it but there is a bottom plate behind the bottom 2x4 in the pictures. After the bottom plate was put down I measured from the top of the bottom plate to the bottom of the top plate on the old deck so that I knew how long to make my supports. (In the picture on the left you can see the 2 center supports are 4x4's that is because my Buddy likes to do overkill on some things.)  Now after the supports are in we put (2) 2x4s in. One on top and one on bottom.

As you can see in the right hand pic, we used old deck boards as a face on the deck so with everything lined up and ready to go, we started to put the face boards on. We started on the corner and worked in, because he wanted the rip where we connected the two porches together.


Some people are wondering why he's using old deck boards, it's because he likes the weathered look and it saves some money because they were free. After the front was finished, we started on the back or far left side. We measured the door going in and found the that near the house was the best place. So we framed up for the door and because it is a porch, we did not frame it like a house.We also made the hand rail the same height as the rest of the porch.We have finished the framing and face boards, so here are pic's of what the finished deck looks like.


 LEAS

Tuesday, May 10, 2011

Revamping an Old Deck to Look New

Hi all! Yesterday I went over to a friend's house after he called and asked if it was possible to give his old deck a makeover. After hearing what it was that he wanted to do we made a course of action. As you can see, the deck is older but still strong and is low to the ground so no hand rails were put on. What we decided was to run a handrail of the same height all the way around the deck. Now the materials for this project were around $325.(We went to Home Depot. )

left side
right side

Materials:

15-2x4x10
2-2x6x10
2-4x4x8
3-3/4x8 pressure treated plywood
1-5lb box of 2" deck screws
1-1lb box of 3"deck screws

Here is a short video, I will have more pics of progress on Friday.


Wednesday, May 4, 2011

Repairing a Deck for Under $50

My friend bought a home with a deck this winter. Well after going through winter and spring. We discovered that his deck was coming apart in a corner. Since he doesn't have the money to completely replace it, we decided to repair it until he can replace it. I will show what was wrong, and explain how and what we did to repair it.

Step 1:

We Identified the problem by inspecting the deck and seeing that the front right corner was coming apart. Whoever built the deck did not know what they were doing. Here is why I think that:

1. The floor joists are about 4' apart.
2. Part of the deck is screwed down and the other part is nailed.
3. After closer inspection, I found that the floor trusses are not the same size.


Step 2 :

I figured out what would be needed to fix this current problem and make it safe for the family. I had my buddy go and get a box of 3" deck screws and 2" deck screws. After that we gathered up our tools to do the repair.  

Tools needed:

Cordless Drill
Phillips Head Bit
Drill Bits
Safety Glasses
Level

I want to show some of the things that I found wrong before I go too far. This outside band only had 2 screws per post. You need a minimum of (3) 3" screws. There are a total of (8) 4x4's on the outside of this deck.


Step 3:

I started where the band board was still mounted to the deck solidly and added 2 screws. I drilled 2 pilot holes so that I would not split the wood. After I  drilled all my pilot holes I went back and put screws in the holes, starting from the house and working my way out to where it pulled away from the 4x4's. I put a minimum of 3 screws per inside 4x4 and 5 on the outside 4x4's. After going around the whole the deck we use a small box of 50 screws.

Here are pictures of after we finished with the deck. It's solid and not moving which is what you want when finished.


Tuesday, May 3, 2011

Just starting out

Hi all, I just wanted to let you know a little about me. I worked in construction for 13yrs and maintenance for 6yrs. I started this blog because I believe that everyone should be able to repair their own home and know when to call a professional to do a repair. I will be doing different projects in the future and give step by step instructions so that you can follow along and do it yourself at home. I will be working on traditional houses and mobile homes as well.